La Marzocco Linea/FB-70 Steam Valve Re-build Kit
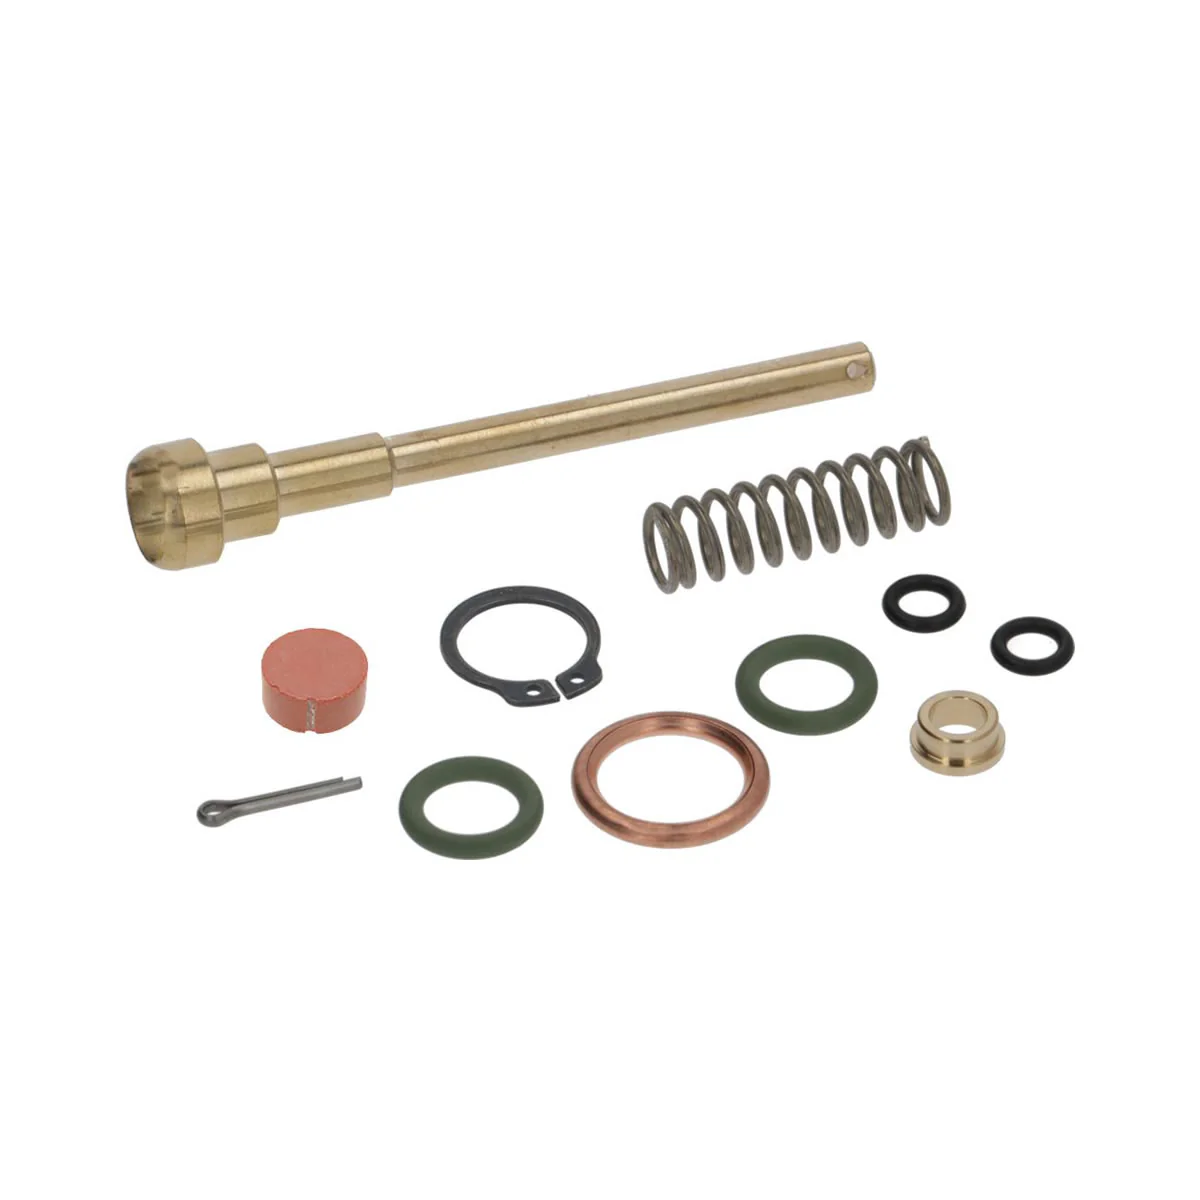
The La Marzocco steam valve re-build kit includes the brass valve piston shaft with gasket, the piston shaft spring, the brass shaft spring bushing, two (small black) o-rings for the piston shaft, two valve body articulation (large green) o-rings for the forward and backwards steam wand movement, a cotter pin for the knob washer and the copper valve body crush washer.
STEAM VALVE SERVICE (Perform every three to four months)
For the rebuilding of the steam valve, first shut off the ball valve on the steam supply pipe coming off of the boiler. If there is no ball valve you must turn off the machine and depressurize the steam boiler. Remember all of these components can be very hot.
- Remove the top panel
- Close the ball valve
- Open the steam valve to release any residual pressure
- Remove the outer bezel on the steam valve knob
- Cut and remove the cotter pin with wire cutters
- Unscrew and remove the steam valve knob
- Loosen the steam supply pipe fitting at the back of the valve with a 16 or 17 mm wrench (older equipment used 16 mm)
- Being very careful (or using some kind of guard) loosen the steam valve fixing nut from the front of the valve with a 26 mm wrench
- Remove the nut and pull the valve assembly back towards the boiler and lift out
- Compress the washer and spring against the valve body and remove the circlip with snap ring pliers
- Remove the clip, wand, washer and spring from the valve body (clean off any and all lubricant so your tools cannot slip)
- Clean the valve and inspect for damage
- Loosen the steam valve body and knob fitting using 24 and 26 mm wrenches and separate
- Pull the steam valve shaft out from the fitting by applying upward pressure to the wall of the fitting in order to remove both o-rings and the bushing from inside the housing (if they get stuck in the fitting they may be removed using a pick or small screwdriver)
- Disassemble the shaft, separating the o-rings, bushing (when reassembling the wide end of the bushing should be positioned against the spring) and spring
- Remove the steam wand o-rings from the valve body by prying gently with a small screwdriver
- Remove the steam wand clip
- Remove the steam wand o-rings from the valve yoke
REASSEMBLY
- After liberally applying a food-safe lubricant (on everything, including the spring), reassemble the valve with the new parts
- Test that the parts all move freely and smoothly
- Reinstall the valve and wand assembly back into the machine opposite of the removal instructions above, tightening the supply pipe securly
- Reinstall the valve knob and washer, lubricating the threads and waher
- Using standard pliers, pull the steam valve shaft out away from the machine and using needle nose pliers install the new cotter pin
- Reinstall the front knob bezel
- Turn the ball valve back on
- Replace the top cover
Product Information
Product Information
Shipping & Returns
Shipping & Returns
Description
The La Marzocco steam valve re-build kit includes the brass valve piston shaft with gasket, the piston shaft spring, the brass shaft spring bushing, two (small black) o-rings for the piston shaft, two valve body articulation (large green) o-rings for the forward and backwards steam wand movement, a cotter pin for the knob washer and the copper valve body crush washer.
STEAM VALVE SERVICE (Perform every three to four months)
For the rebuilding of the steam valve, first shut off the ball valve on the steam supply pipe coming off of the boiler. If there is no ball valve you must turn off the machine and depressurize the steam boiler. Remember all of these components can be very hot.
- Remove the top panel
- Close the ball valve
- Open the steam valve to release any residual pressure
- Remove the outer bezel on the steam valve knob
- Cut and remove the cotter pin with wire cutters
- Unscrew and remove the steam valve knob
- Loosen the steam supply pipe fitting at the back of the valve with a 16 or 17 mm wrench (older equipment used 16 mm)
- Being very careful (or using some kind of guard) loosen the steam valve fixing nut from the front of the valve with a 26 mm wrench
- Remove the nut and pull the valve assembly back towards the boiler and lift out
- Compress the washer and spring against the valve body and remove the circlip with snap ring pliers
- Remove the clip, wand, washer and spring from the valve body (clean off any and all lubricant so your tools cannot slip)
- Clean the valve and inspect for damage
- Loosen the steam valve body and knob fitting using 24 and 26 mm wrenches and separate
- Pull the steam valve shaft out from the fitting by applying upward pressure to the wall of the fitting in order to remove both o-rings and the bushing from inside the housing (if they get stuck in the fitting they may be removed using a pick or small screwdriver)
- Disassemble the shaft, separating the o-rings, bushing (when reassembling the wide end of the bushing should be positioned against the spring) and spring
- Remove the steam wand o-rings from the valve body by prying gently with a small screwdriver
- Remove the steam wand clip
- Remove the steam wand o-rings from the valve yoke
REASSEMBLY
- After liberally applying a food-safe lubricant (on everything, including the spring), reassemble the valve with the new parts
- Test that the parts all move freely and smoothly
- Reinstall the valve and wand assembly back into the machine opposite of the removal instructions above, tightening the supply pipe securly
- Reinstall the valve knob and washer, lubricating the threads and waher
- Using standard pliers, pull the steam valve shaft out away from the machine and using needle nose pliers install the new cotter pin
- Reinstall the front knob bezel
- Turn the ball valve back on
- Replace the top cover